Using Globus to transfer files
Globus is a “dropbox-like” service to enable data sharing between academic and research communities. By using Globus, you can easily transfer files between Globus endpoints, share data with collaborators, and easily transfer data between the JHPCE cluster and your local desktop or laptop.
Setting up an account
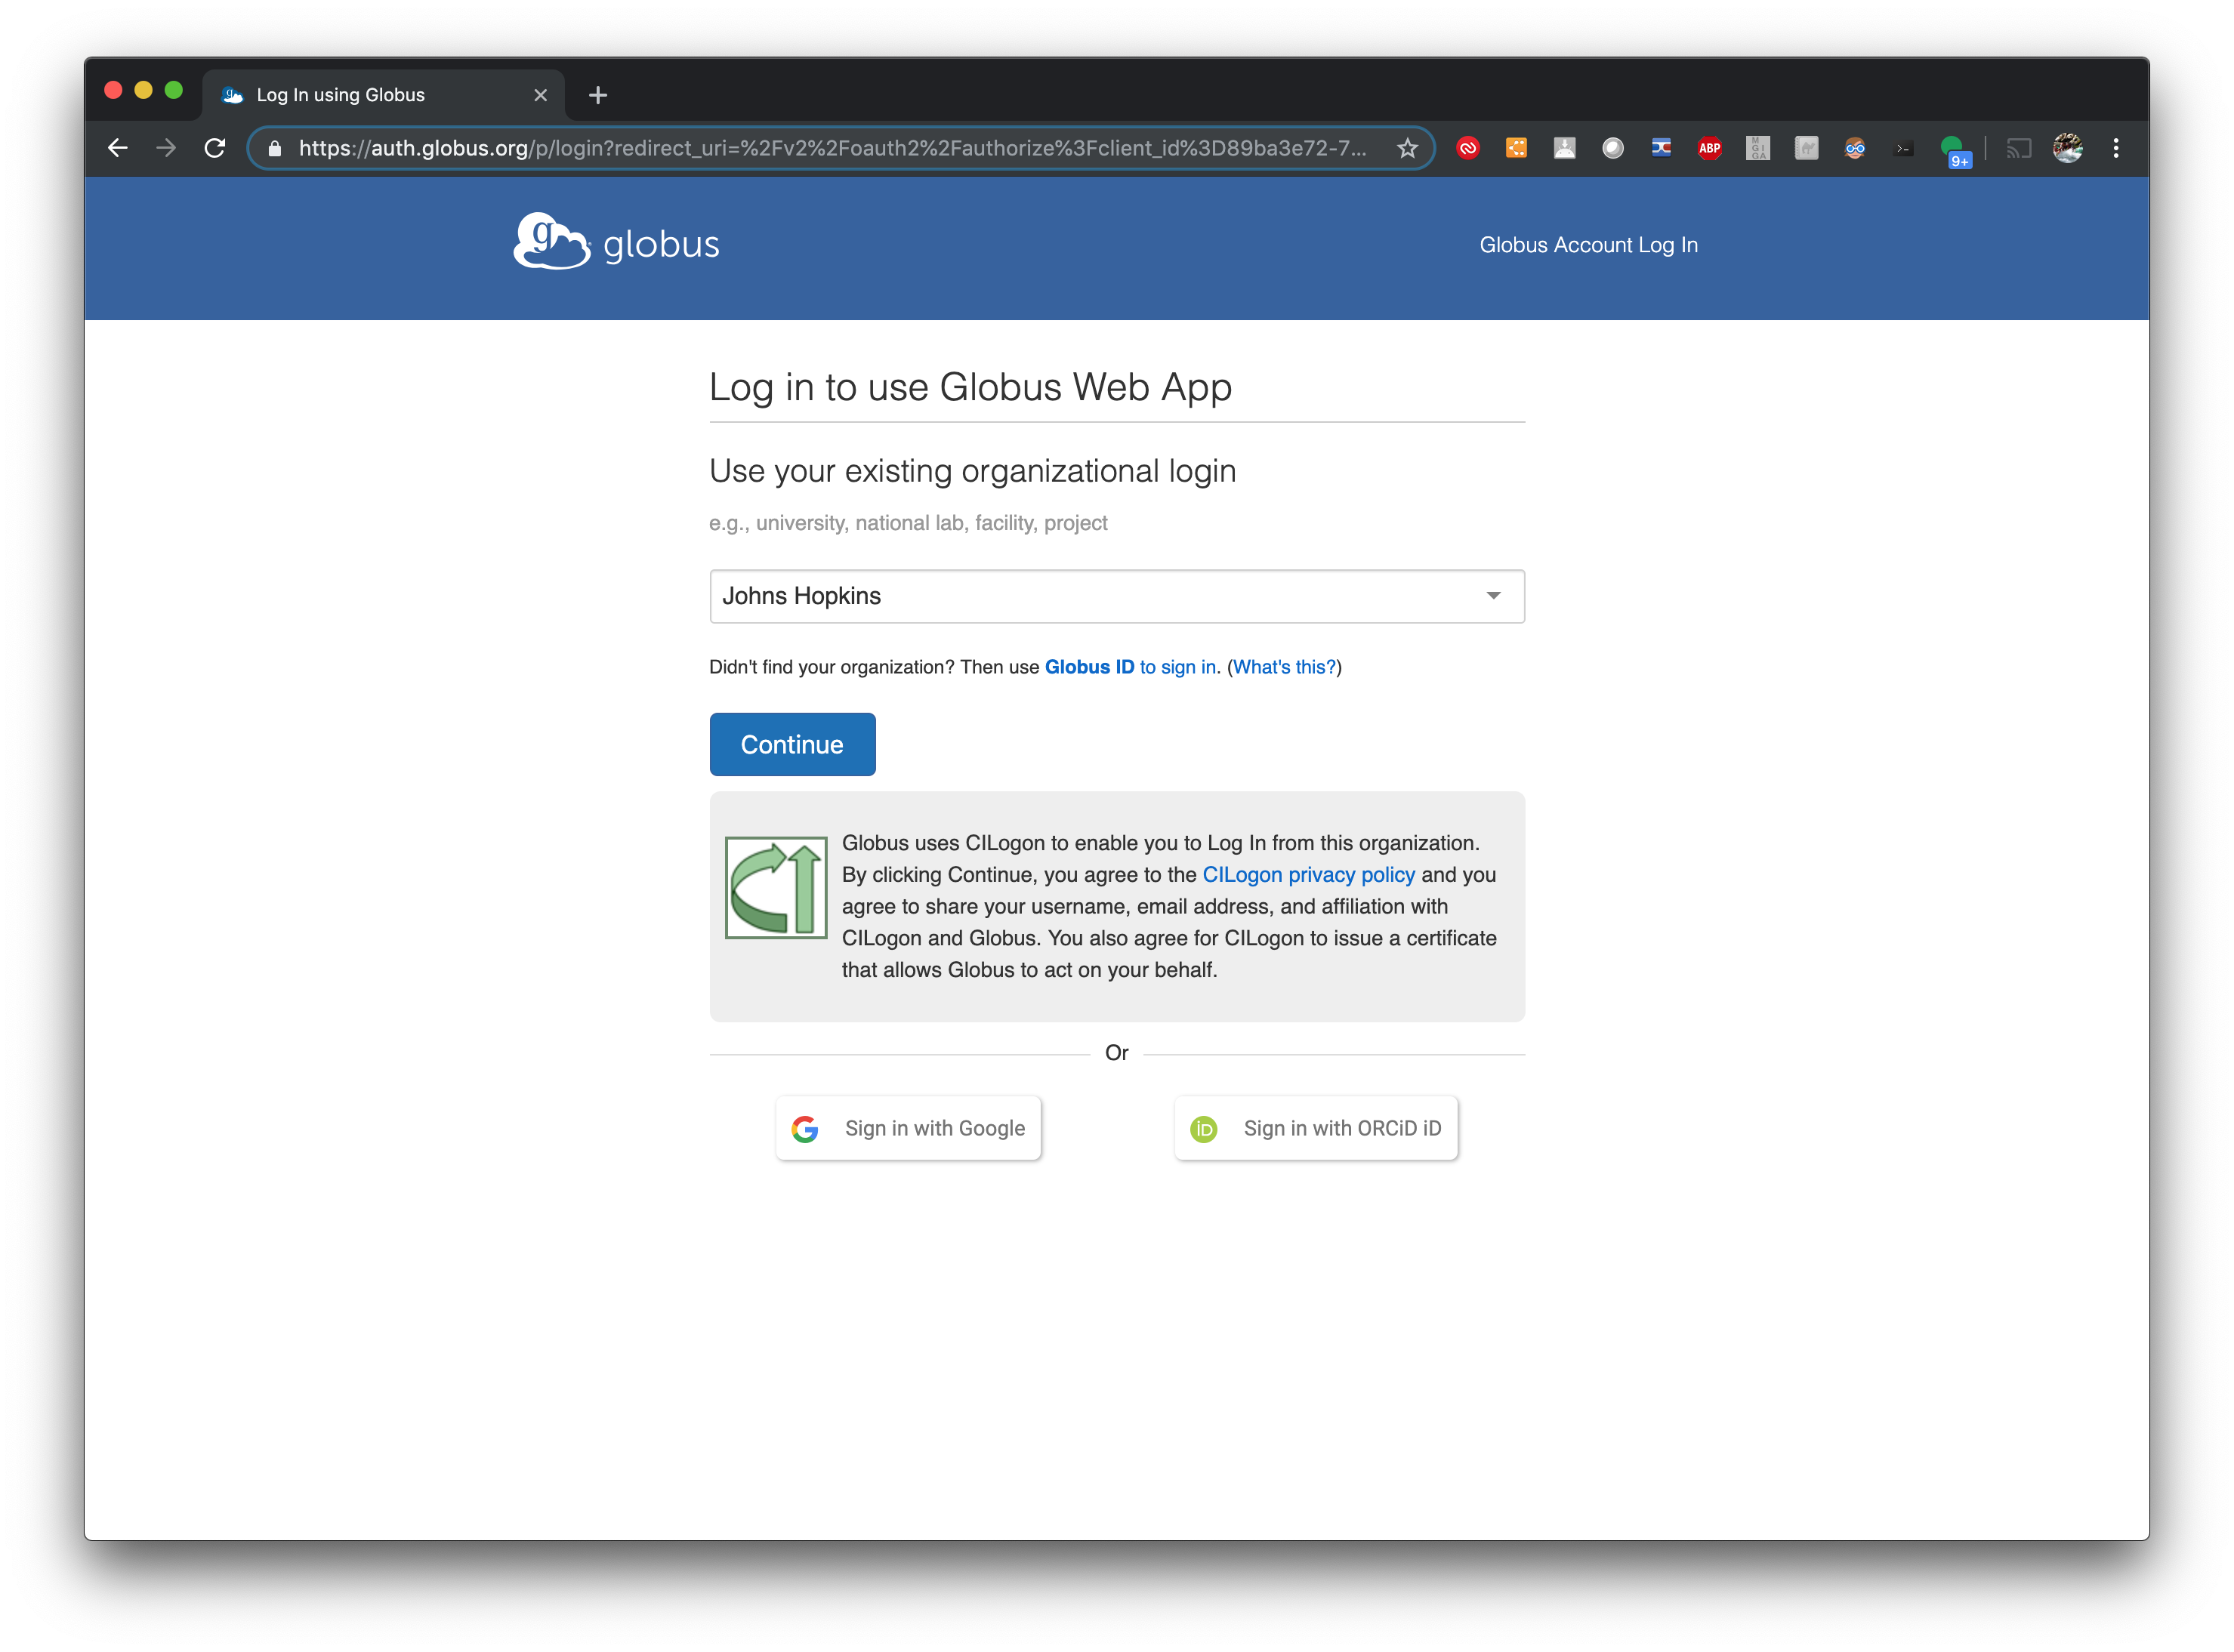
The first step in using Globus is setting up and account on the Globus site. To start, go to https://www.globus.org/ and clicking on the “Log in” button in the upper right. You should now see the screen below. Select “Johns Hopkins” from the list of Organizations.
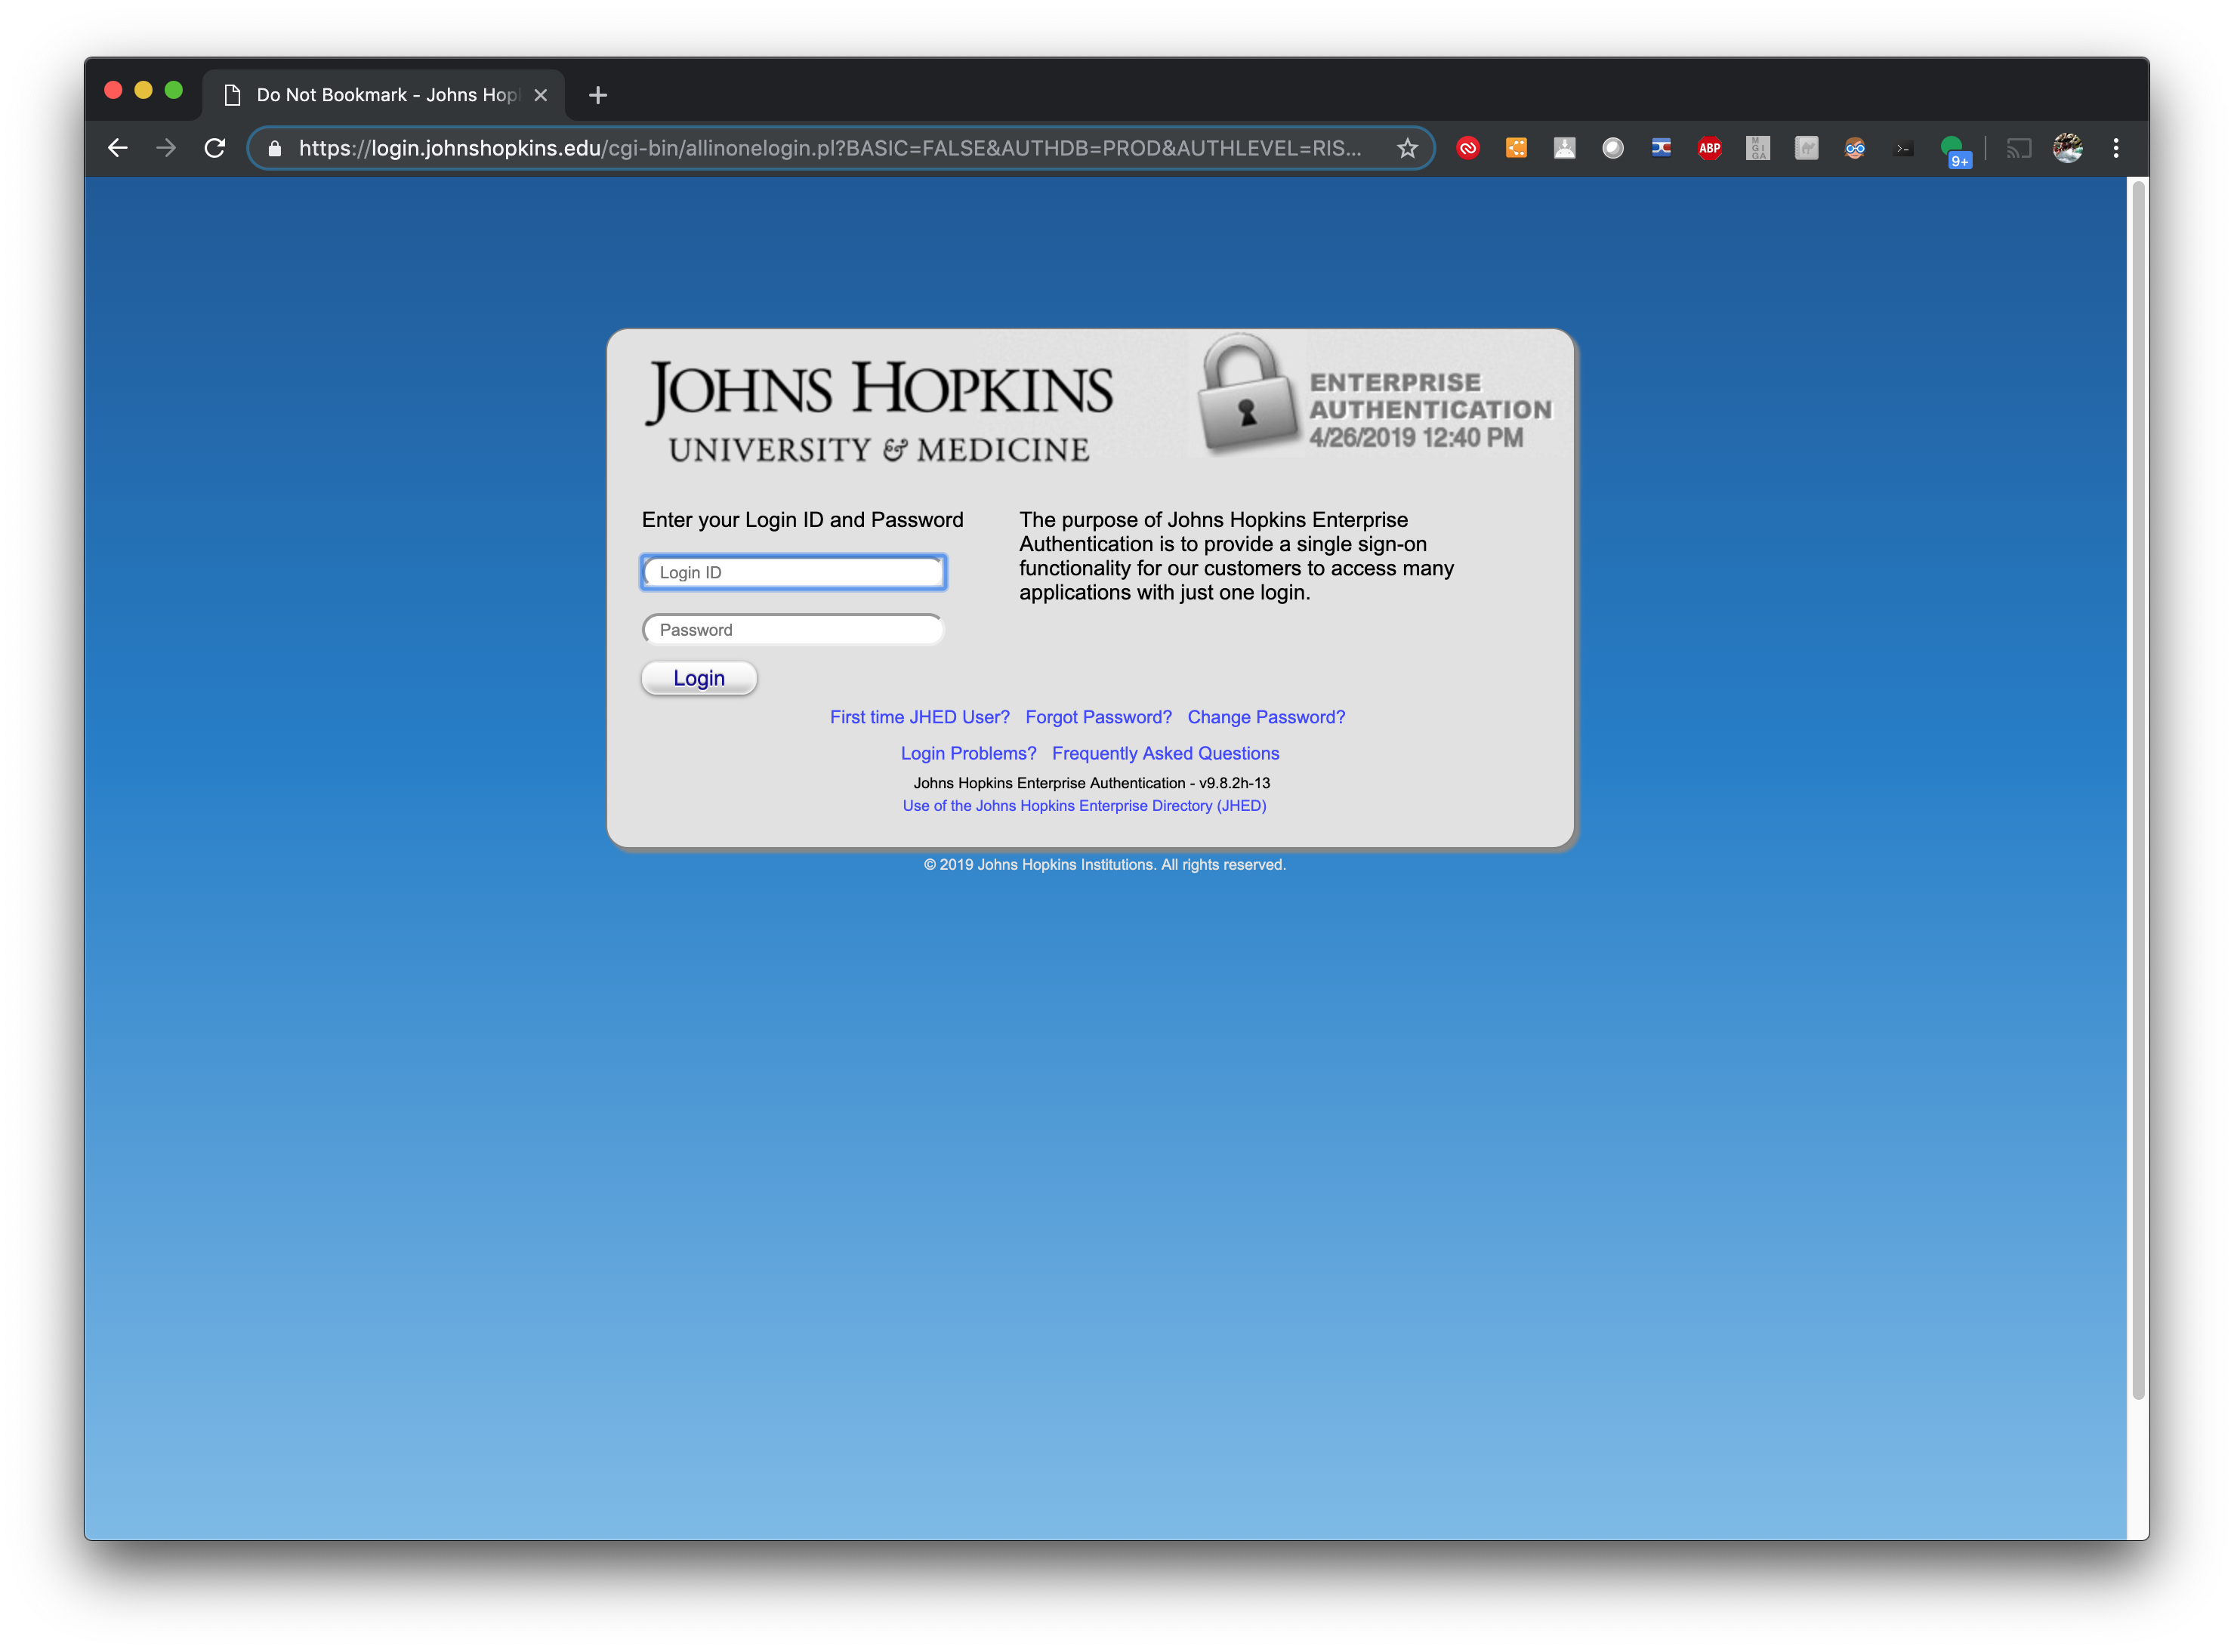
You will now be directed to the JHU Login Screen. Enter your JHED ID and Password:
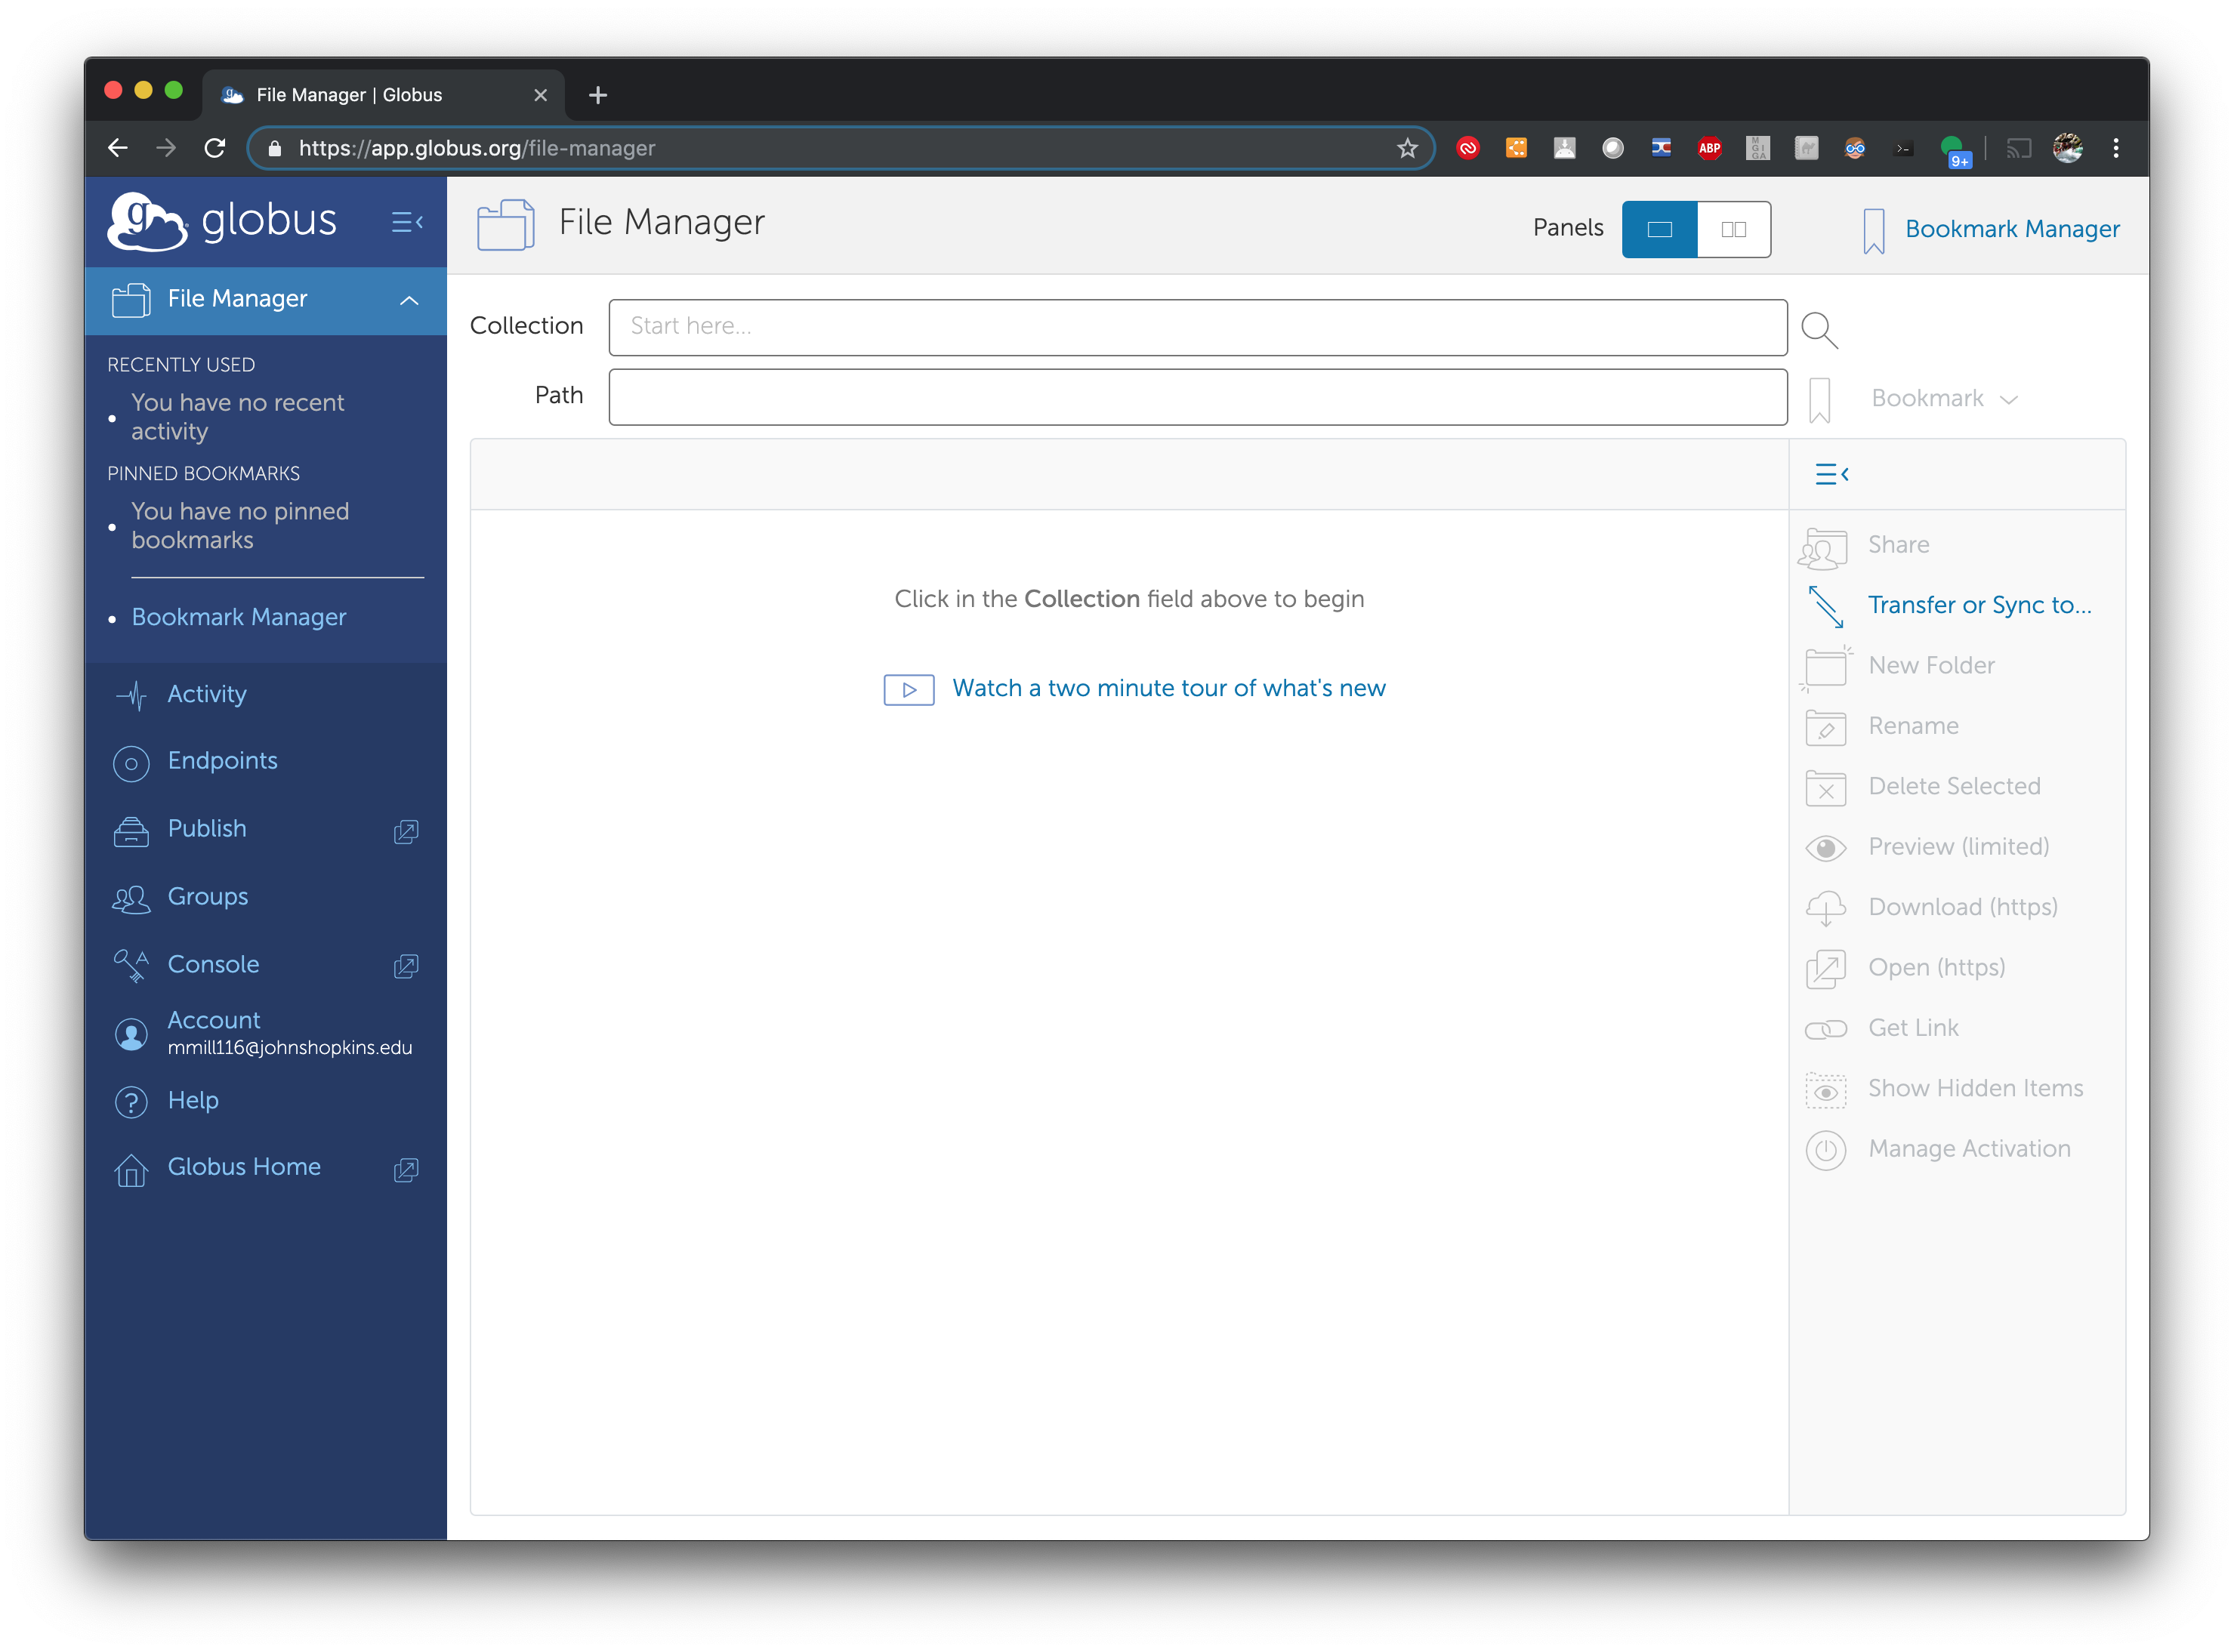
 Once you enter your JHED information you will be sent to the main Globus window:
Transferring Files
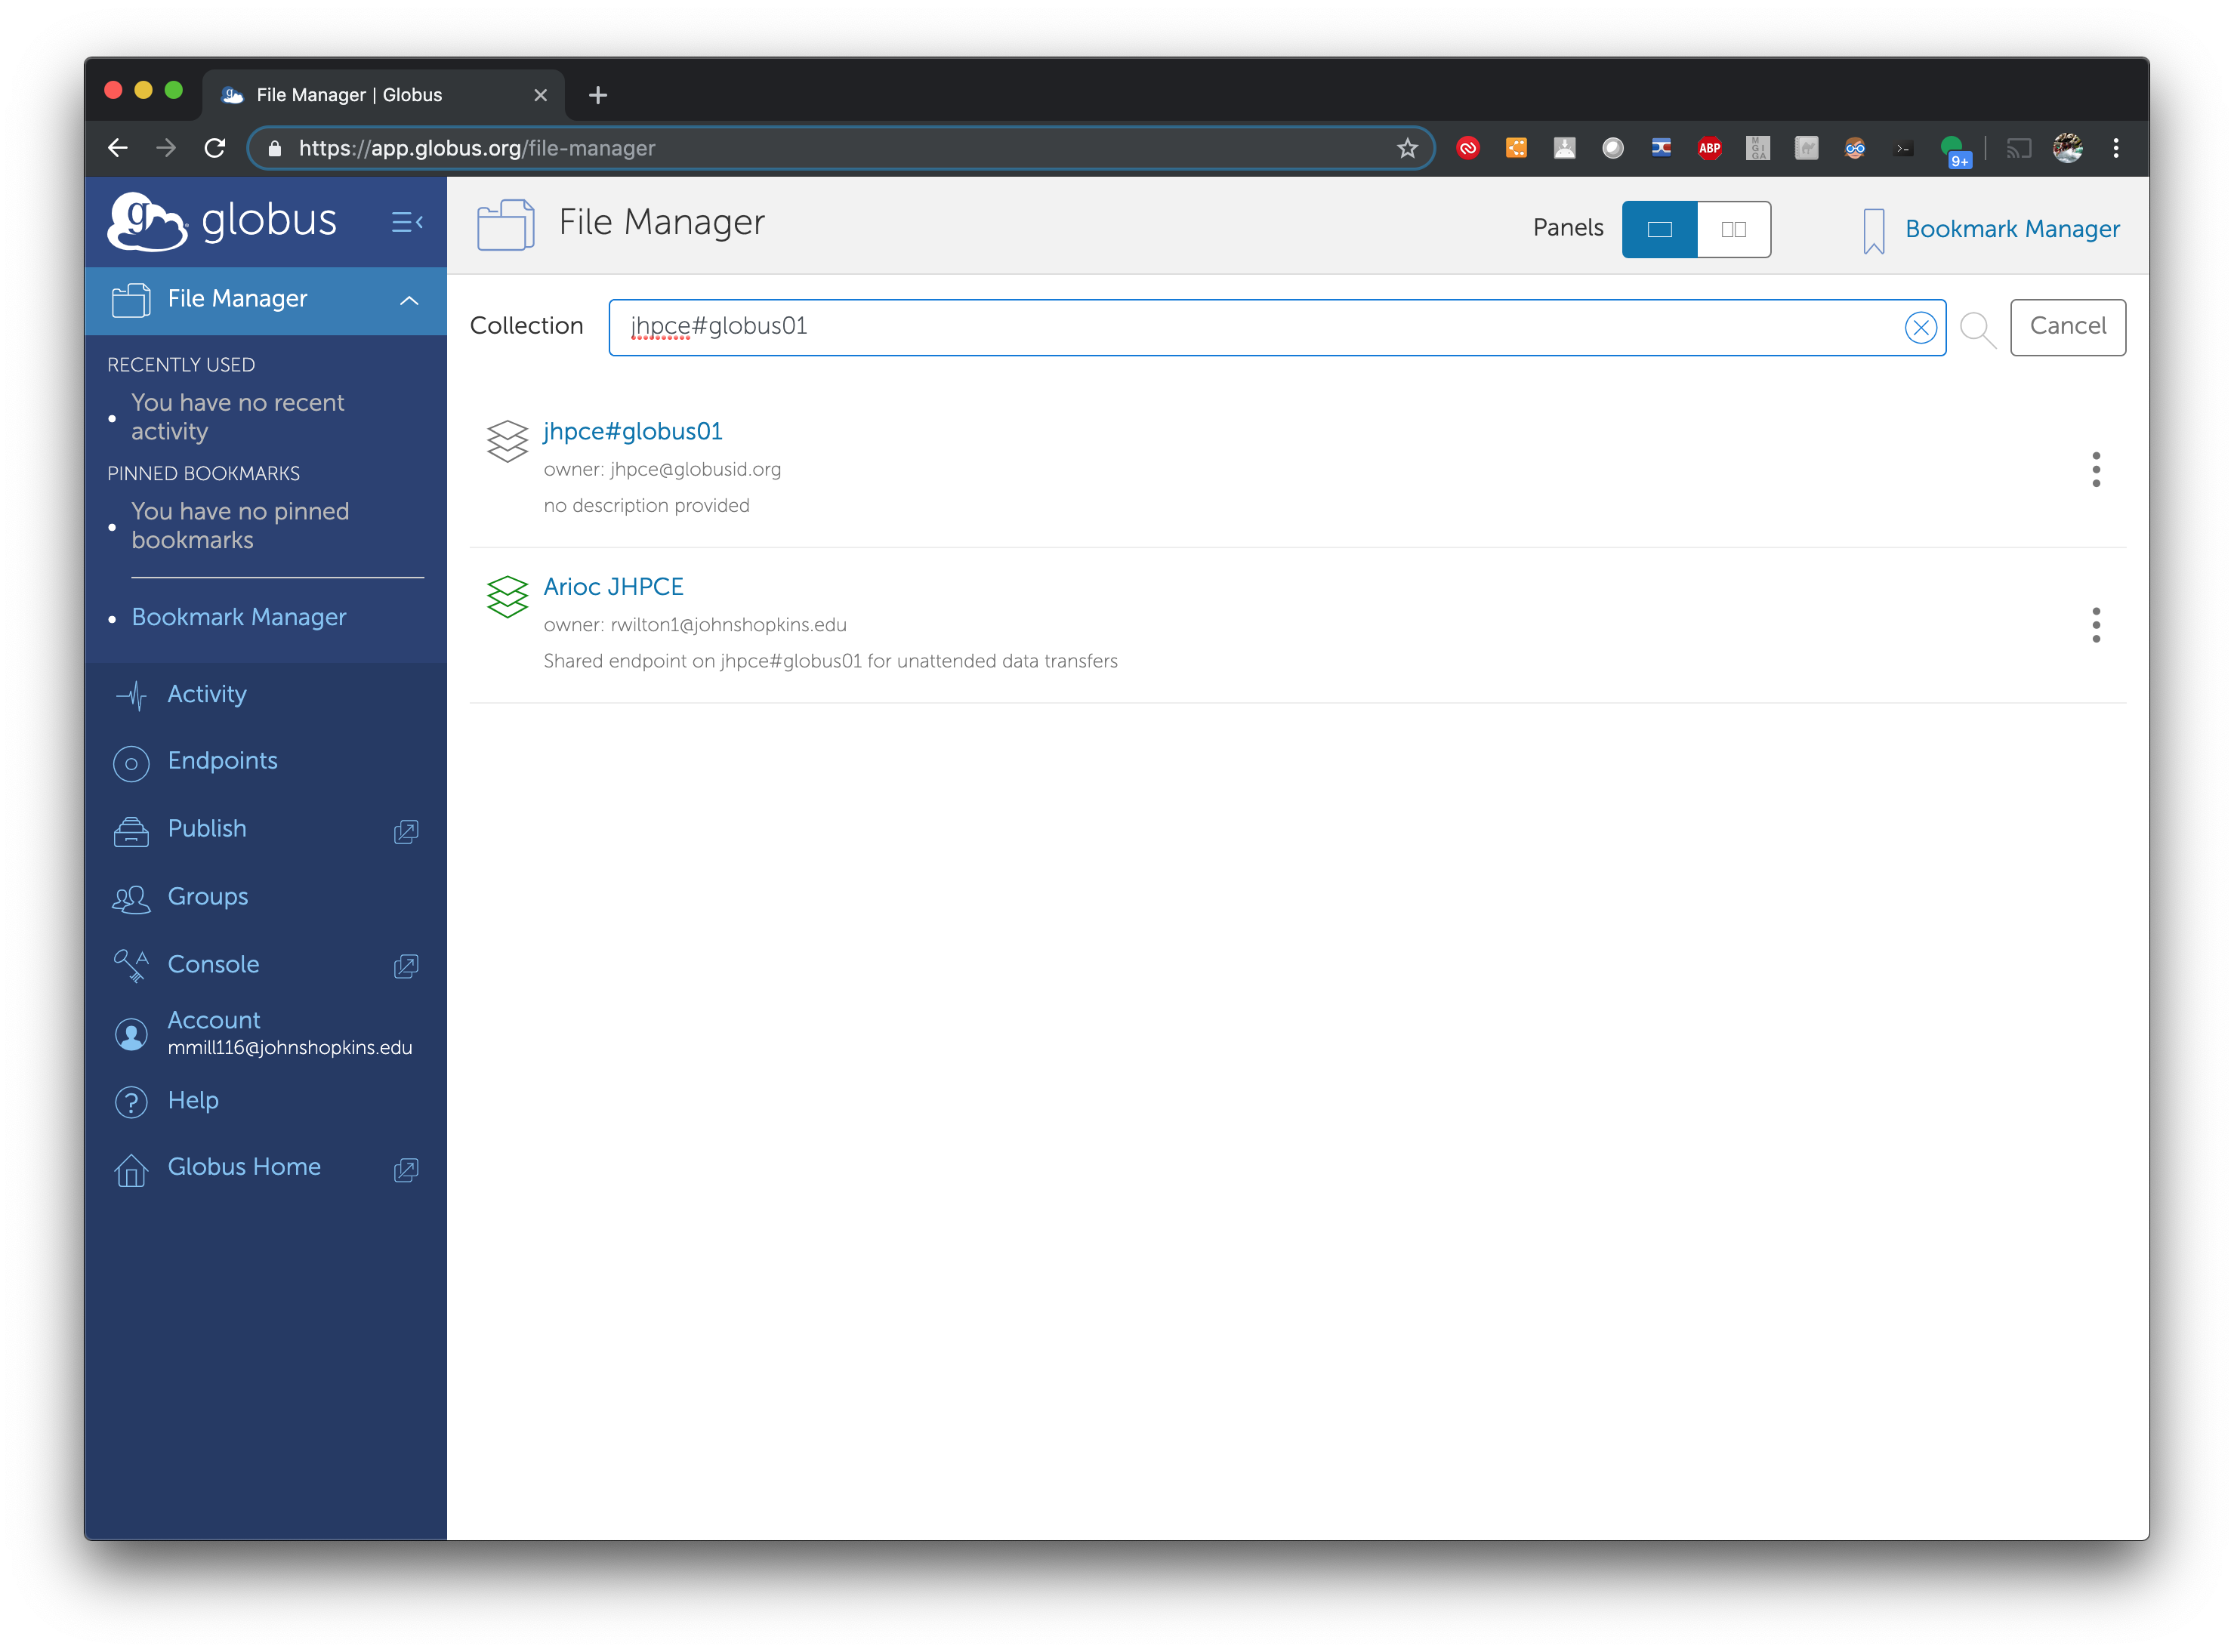
With Globus, you can transfer data between nodes (known as
“Endpoints”) that are part of the Globus network. The endpoint for
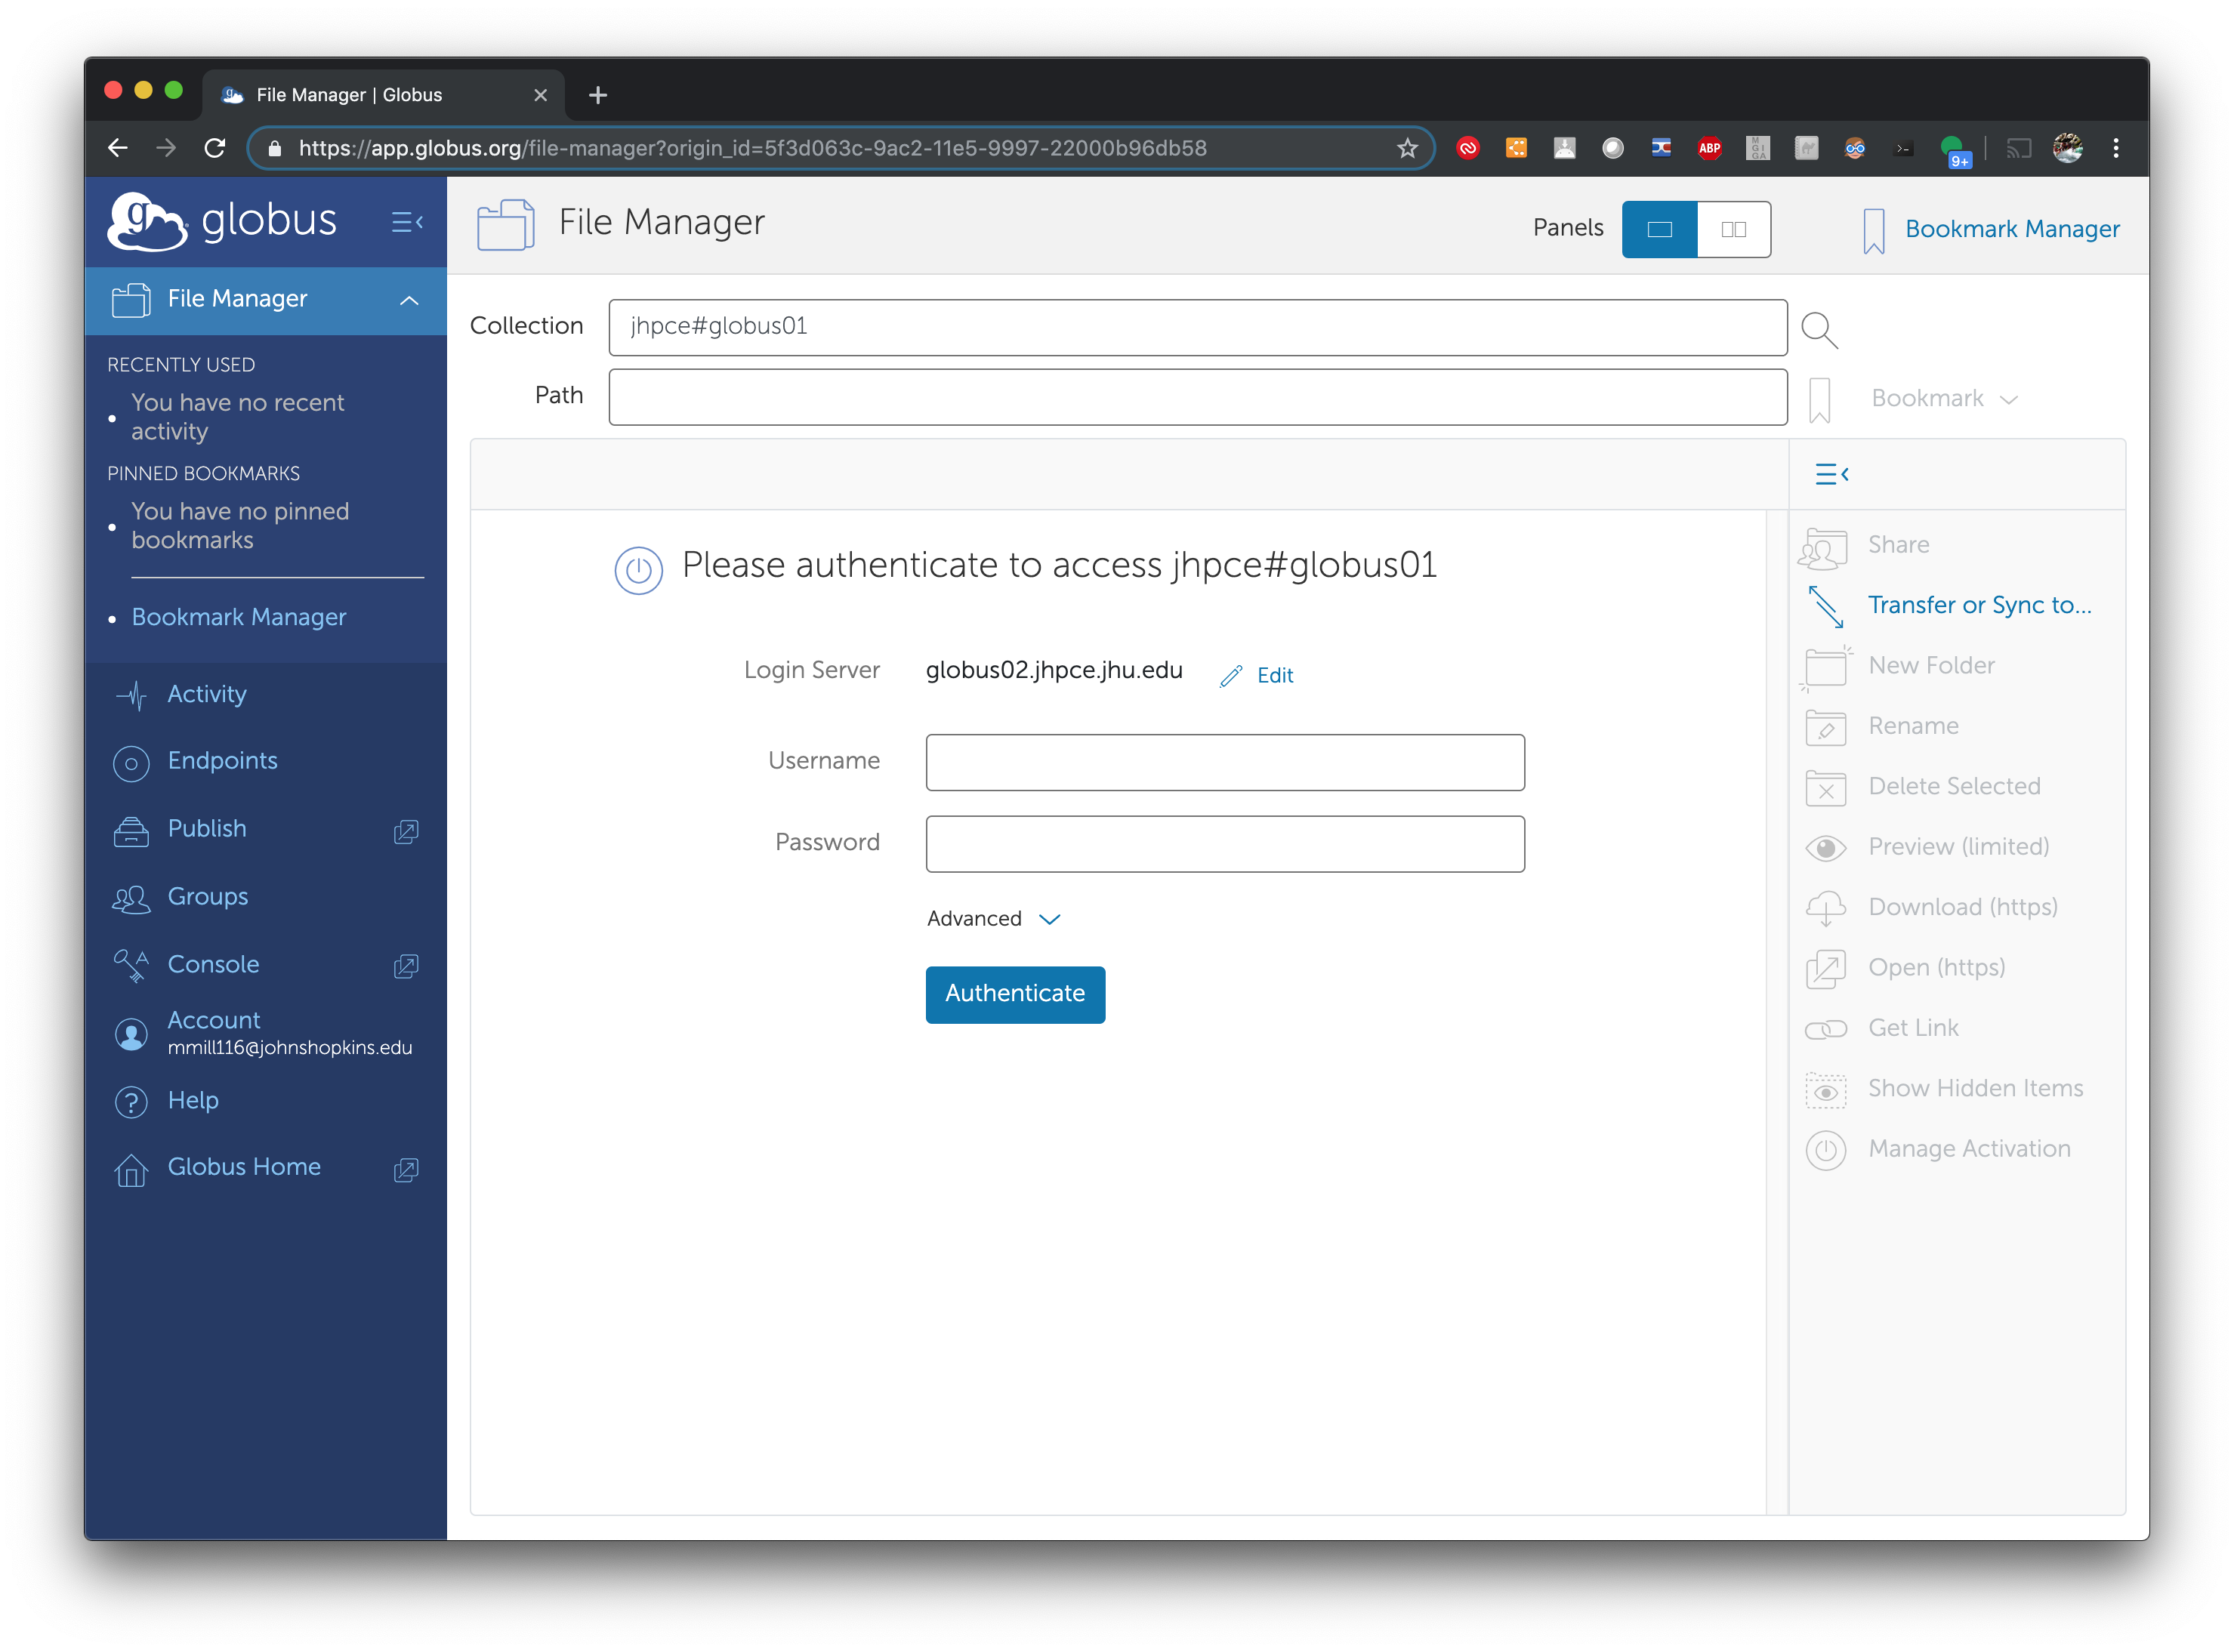
the JHPCE cluster is called jhpce#globus01. To connect to the JHPCE
endpoints, enter jhpce#globus01 in the “Collections field, and
select it from the list of results displayed.
Once you select the jhpce#globus01 endpoint, you will be prompted to enter your JHPCE Login and Password:
And once you login you will be shown a flie list of your home directory on the JHCPE cluster.

In order to transfer data to and from your desktop, you will need to install the Globus Connect Personal package (https://www.globus.org/globus-connect-personal) on your desktop. To do this, click on the “Two-Panel” icon at the top of your globus session, and then click on Install Globus Connect Personal.

On the next screen, follow the steps on the next page to download the appropriate software package for your system, generate a Globus Key, and create a Globu name for your desktop/laptop.
Once you install and start Globus Connect Personal, you will be able to easily transfer files between your desktop/laptop and the JHPCE cluster via the Globus web interface.
Sharing data with others
One of the benefits fo using Globus is that you can share data from
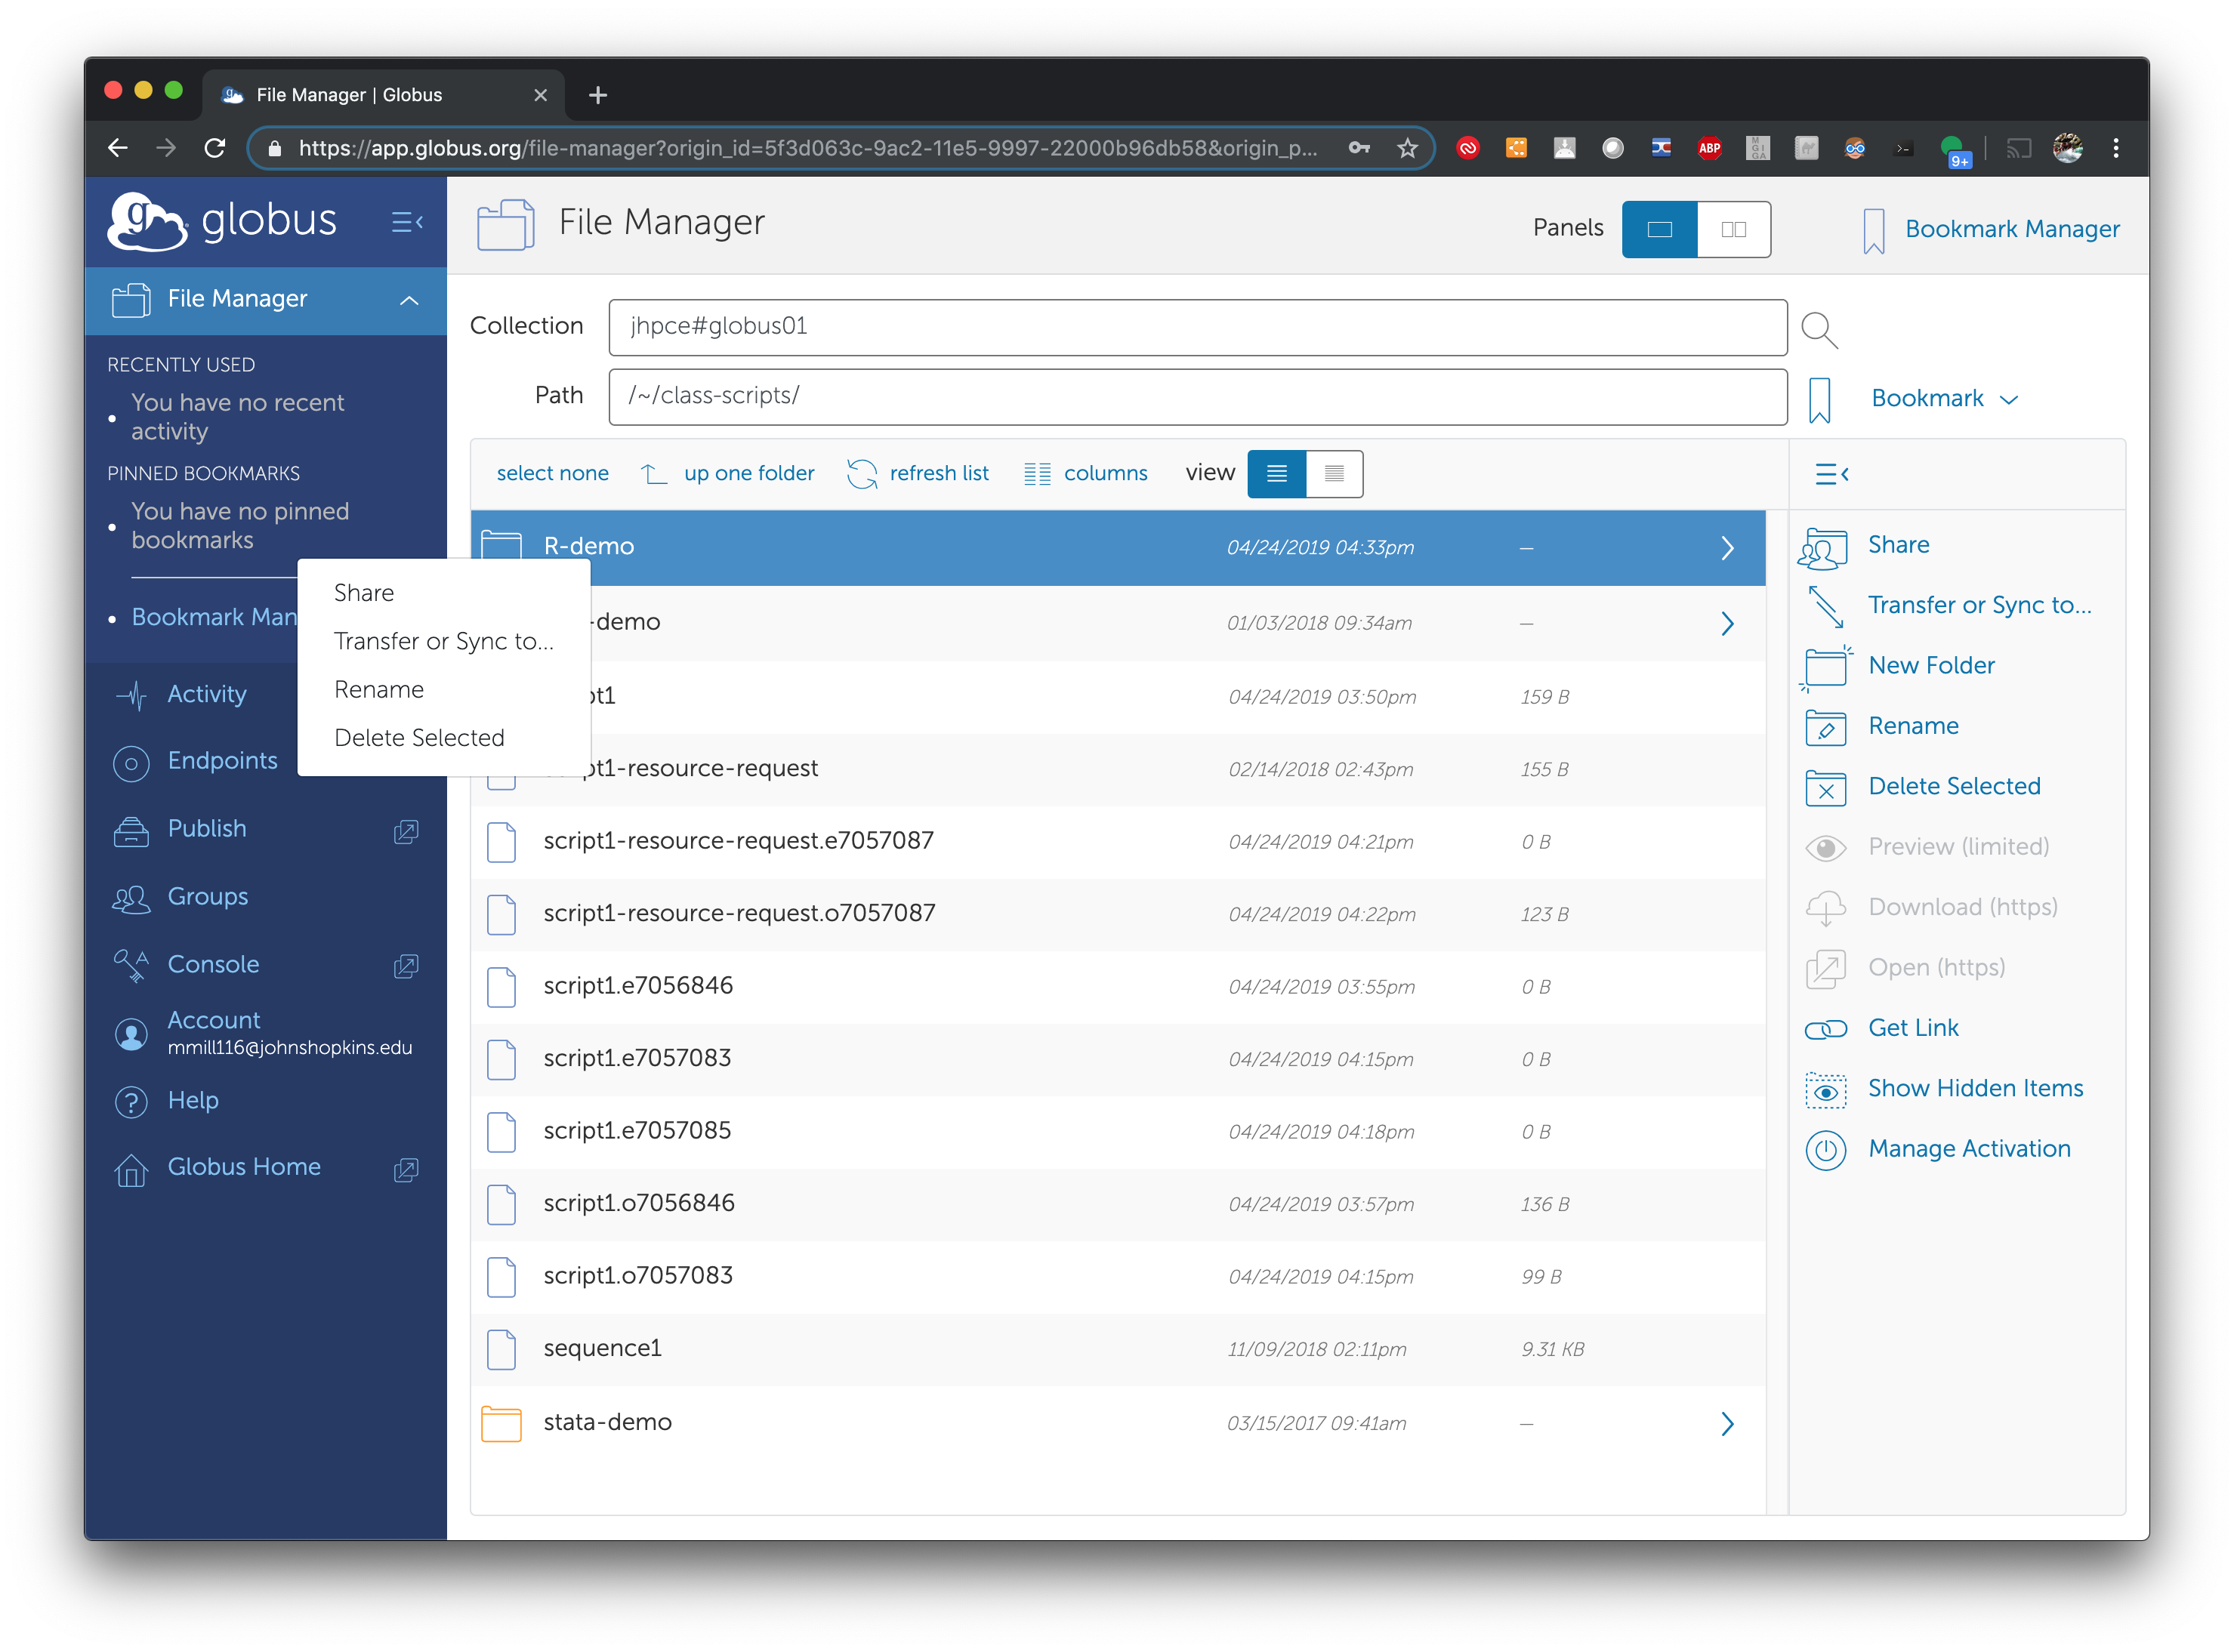
the JHPCE cluster with outside collaborators. To do this navigate to
the directory you wish to share, select it, and either Right-Click on
it, or select “Share” from the menu on the right hand side of the
screen. In this example, I’m sharing the $HOME/class-scripts/R-demo
directory from within my home directory.
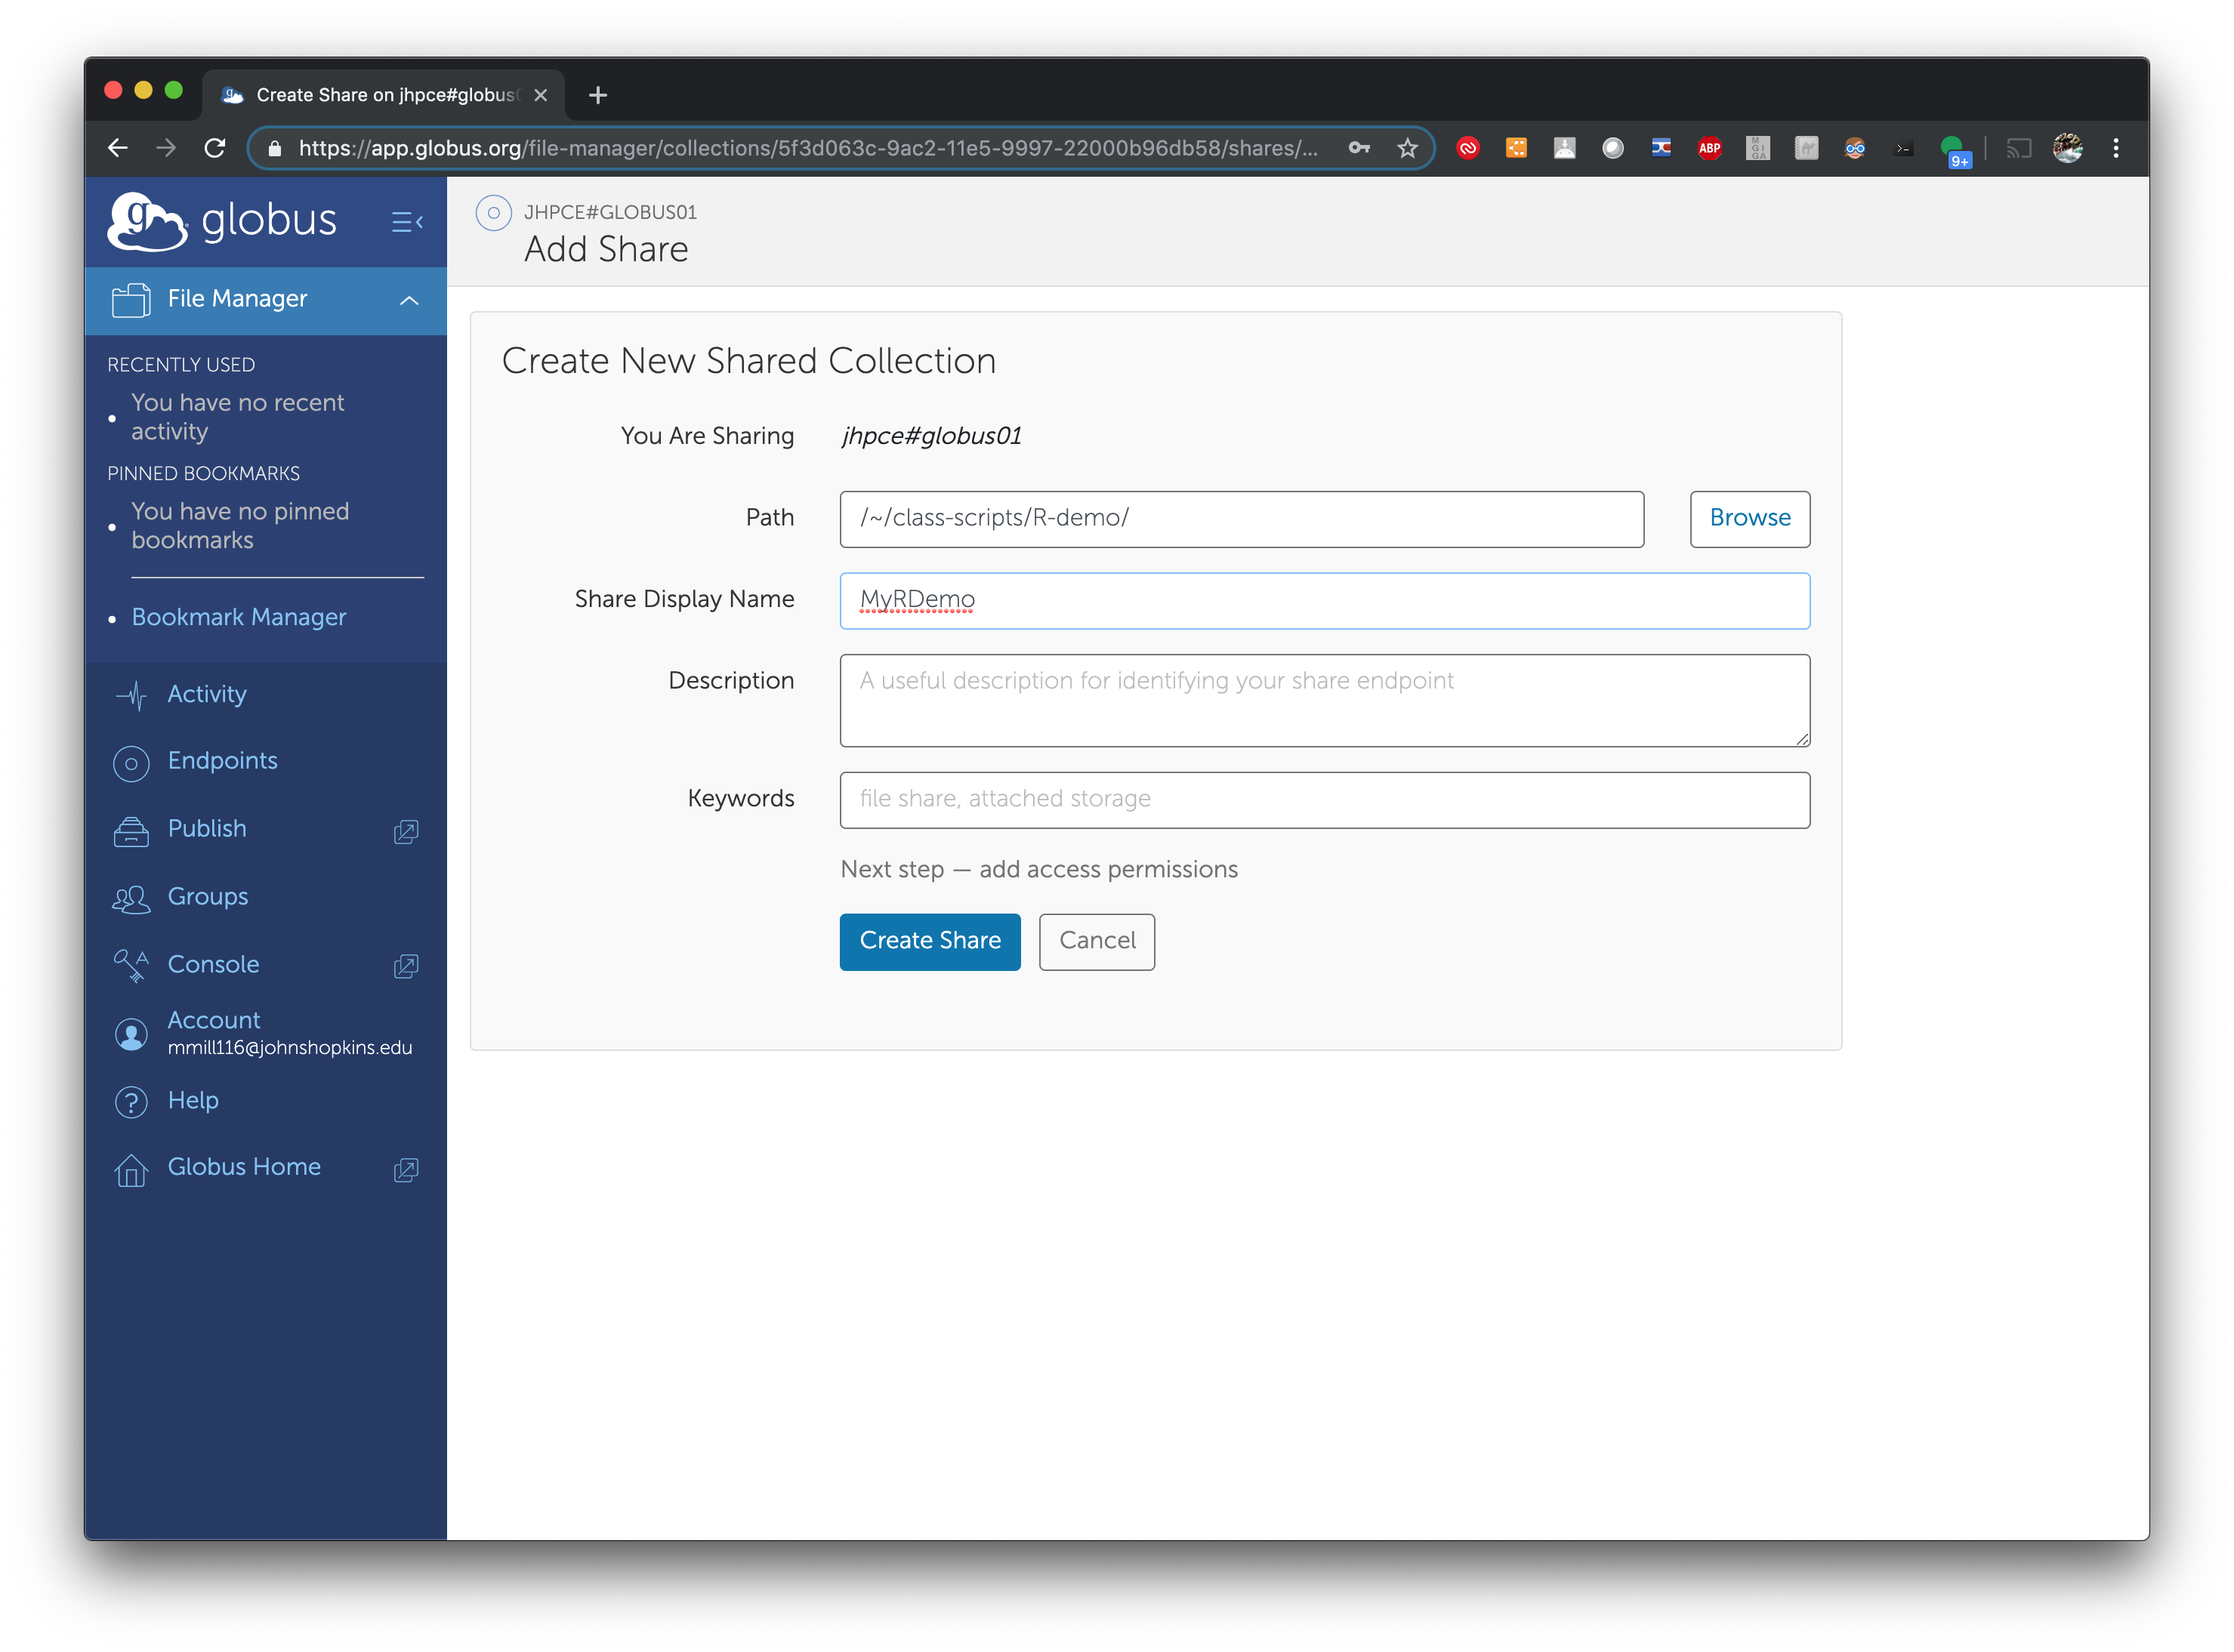
 Next, you will be prompted to provide a name for your share. In this example, I’m calling it “MyRDemo”. Once you enter the name and Description, click “Create Share”:
Next you will be shown the current access permissions, which should be just for your account to start with. To grant others permission to access your share, click on “Add Permissions – Share With”
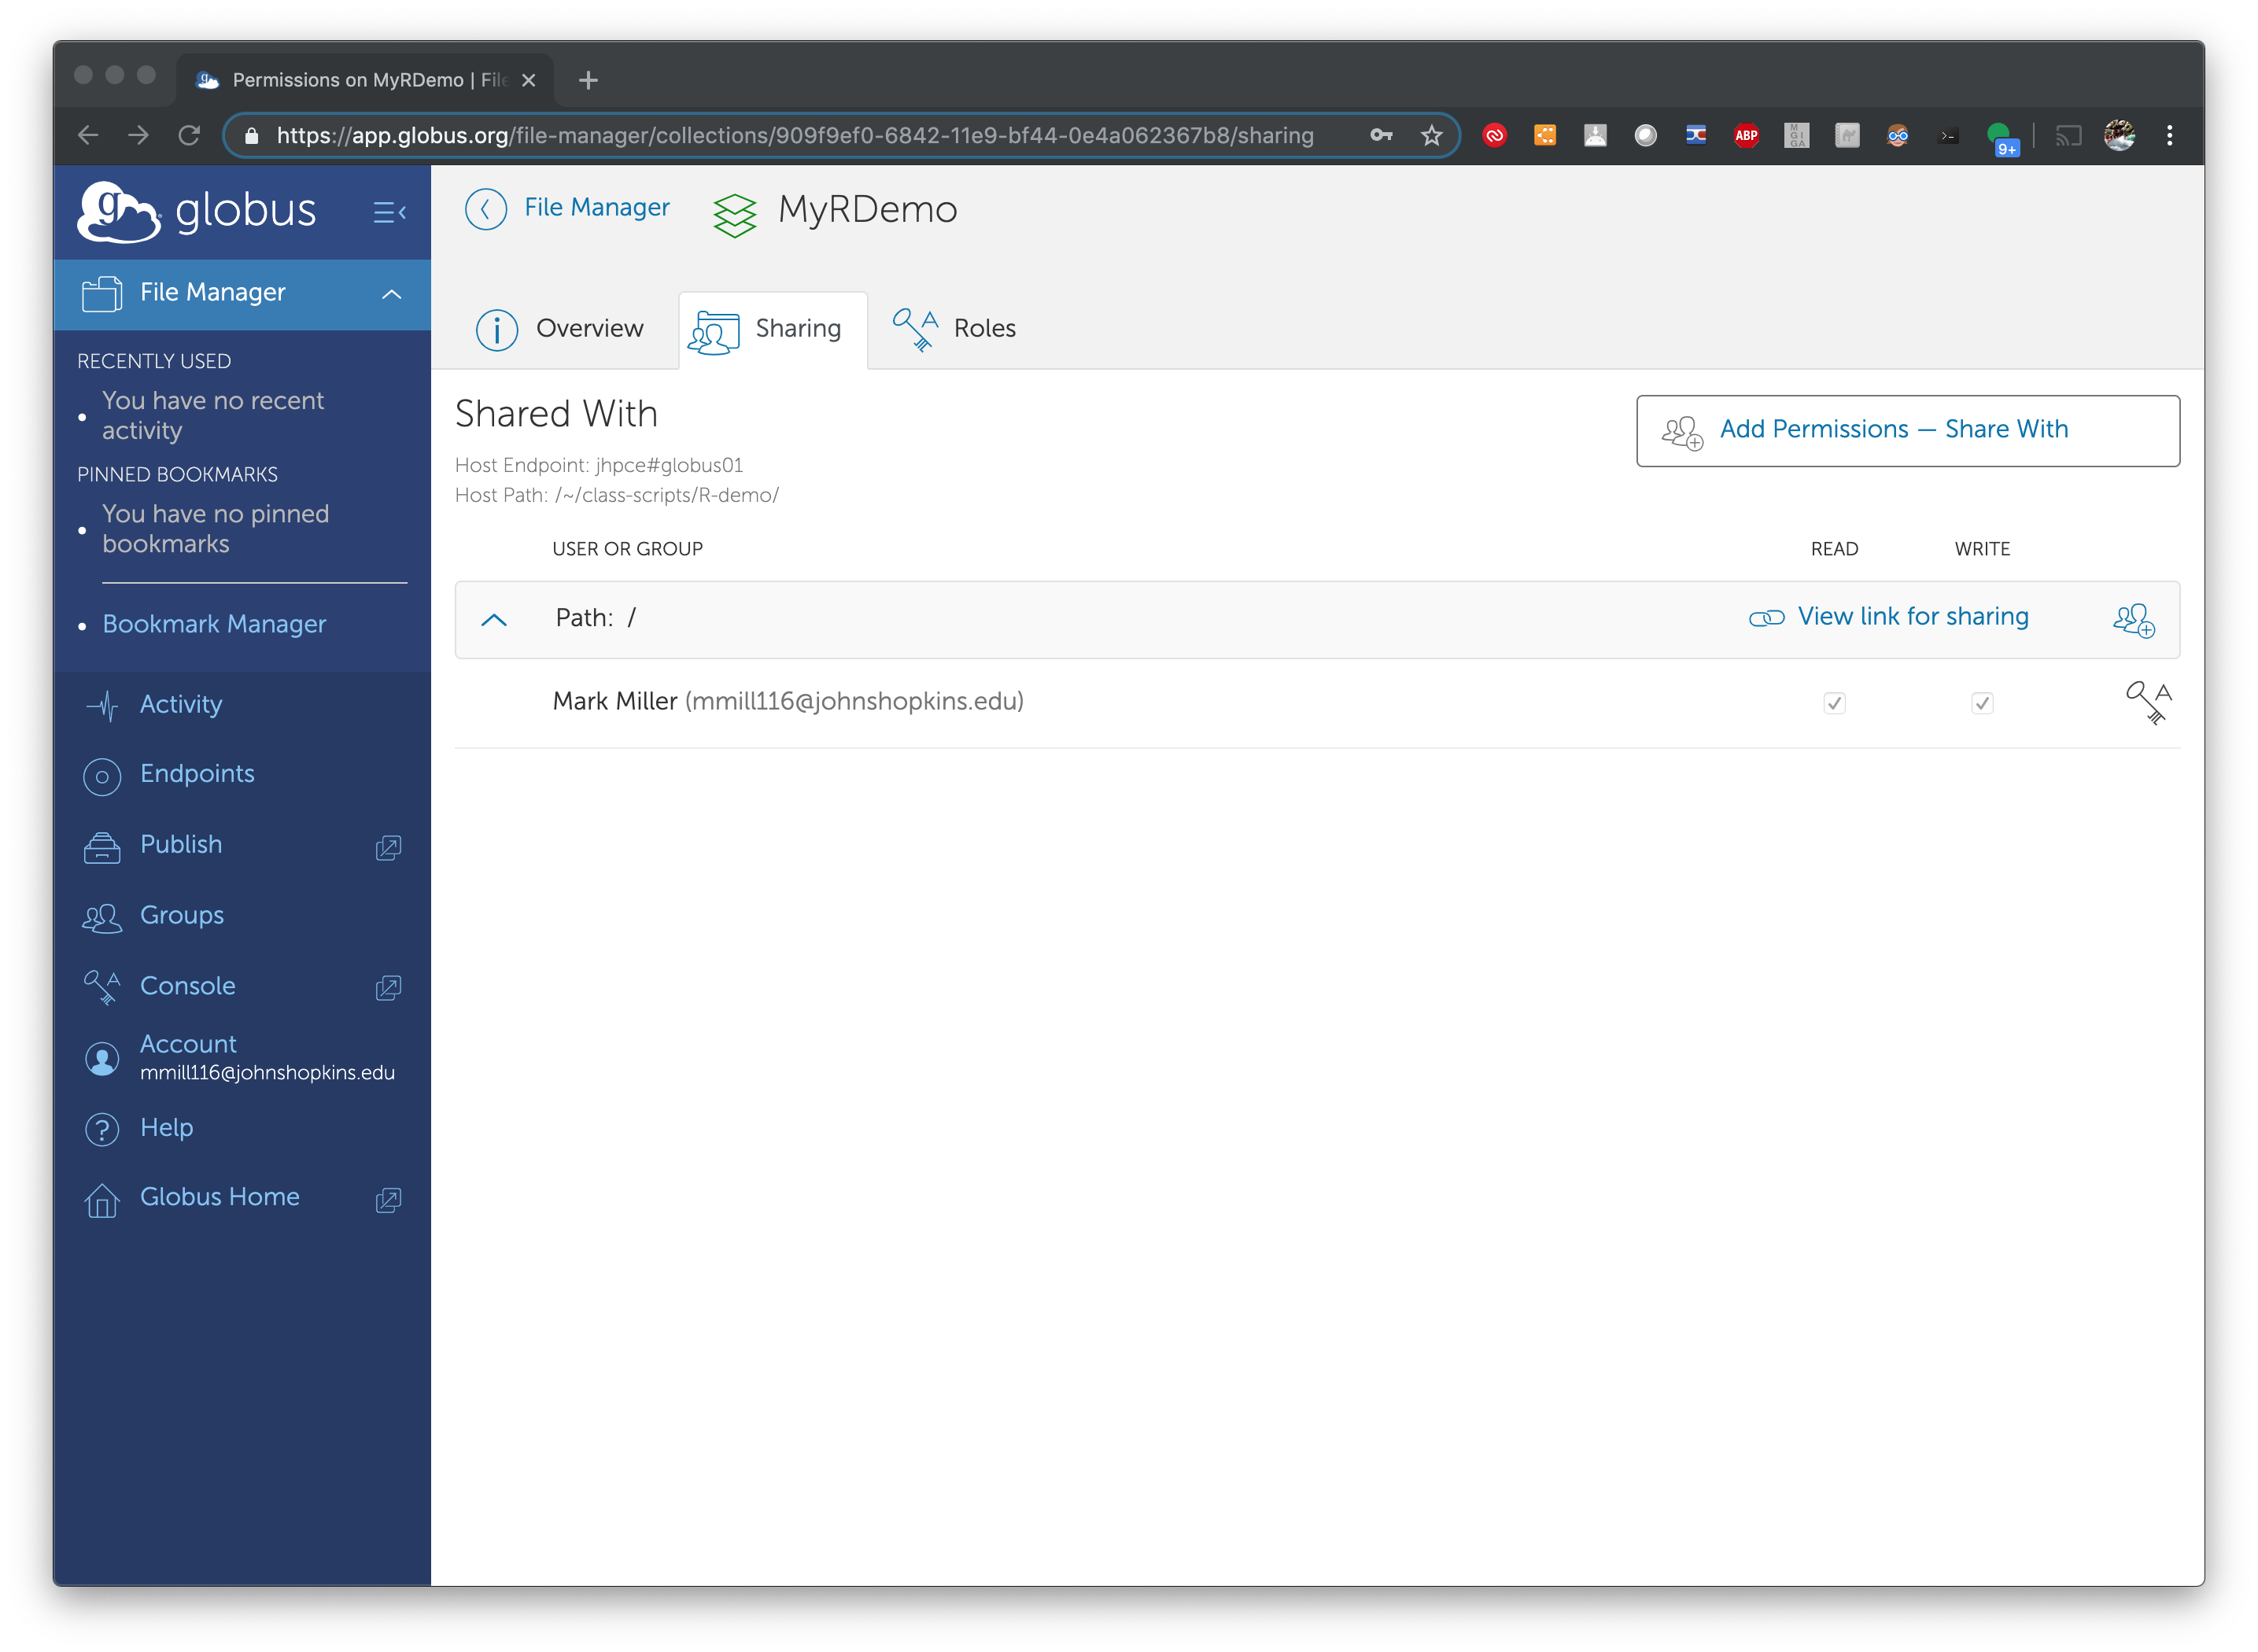 You will now be able to select which users you wish to share your directory with. The person you are sharing with must have a Globus account, and will need to provide their Globus ID or email with you. Enter their Username or Email, click “Add”, and then click “Add Permission”. We strongly recommend that you only grant “read” permission. for your share.
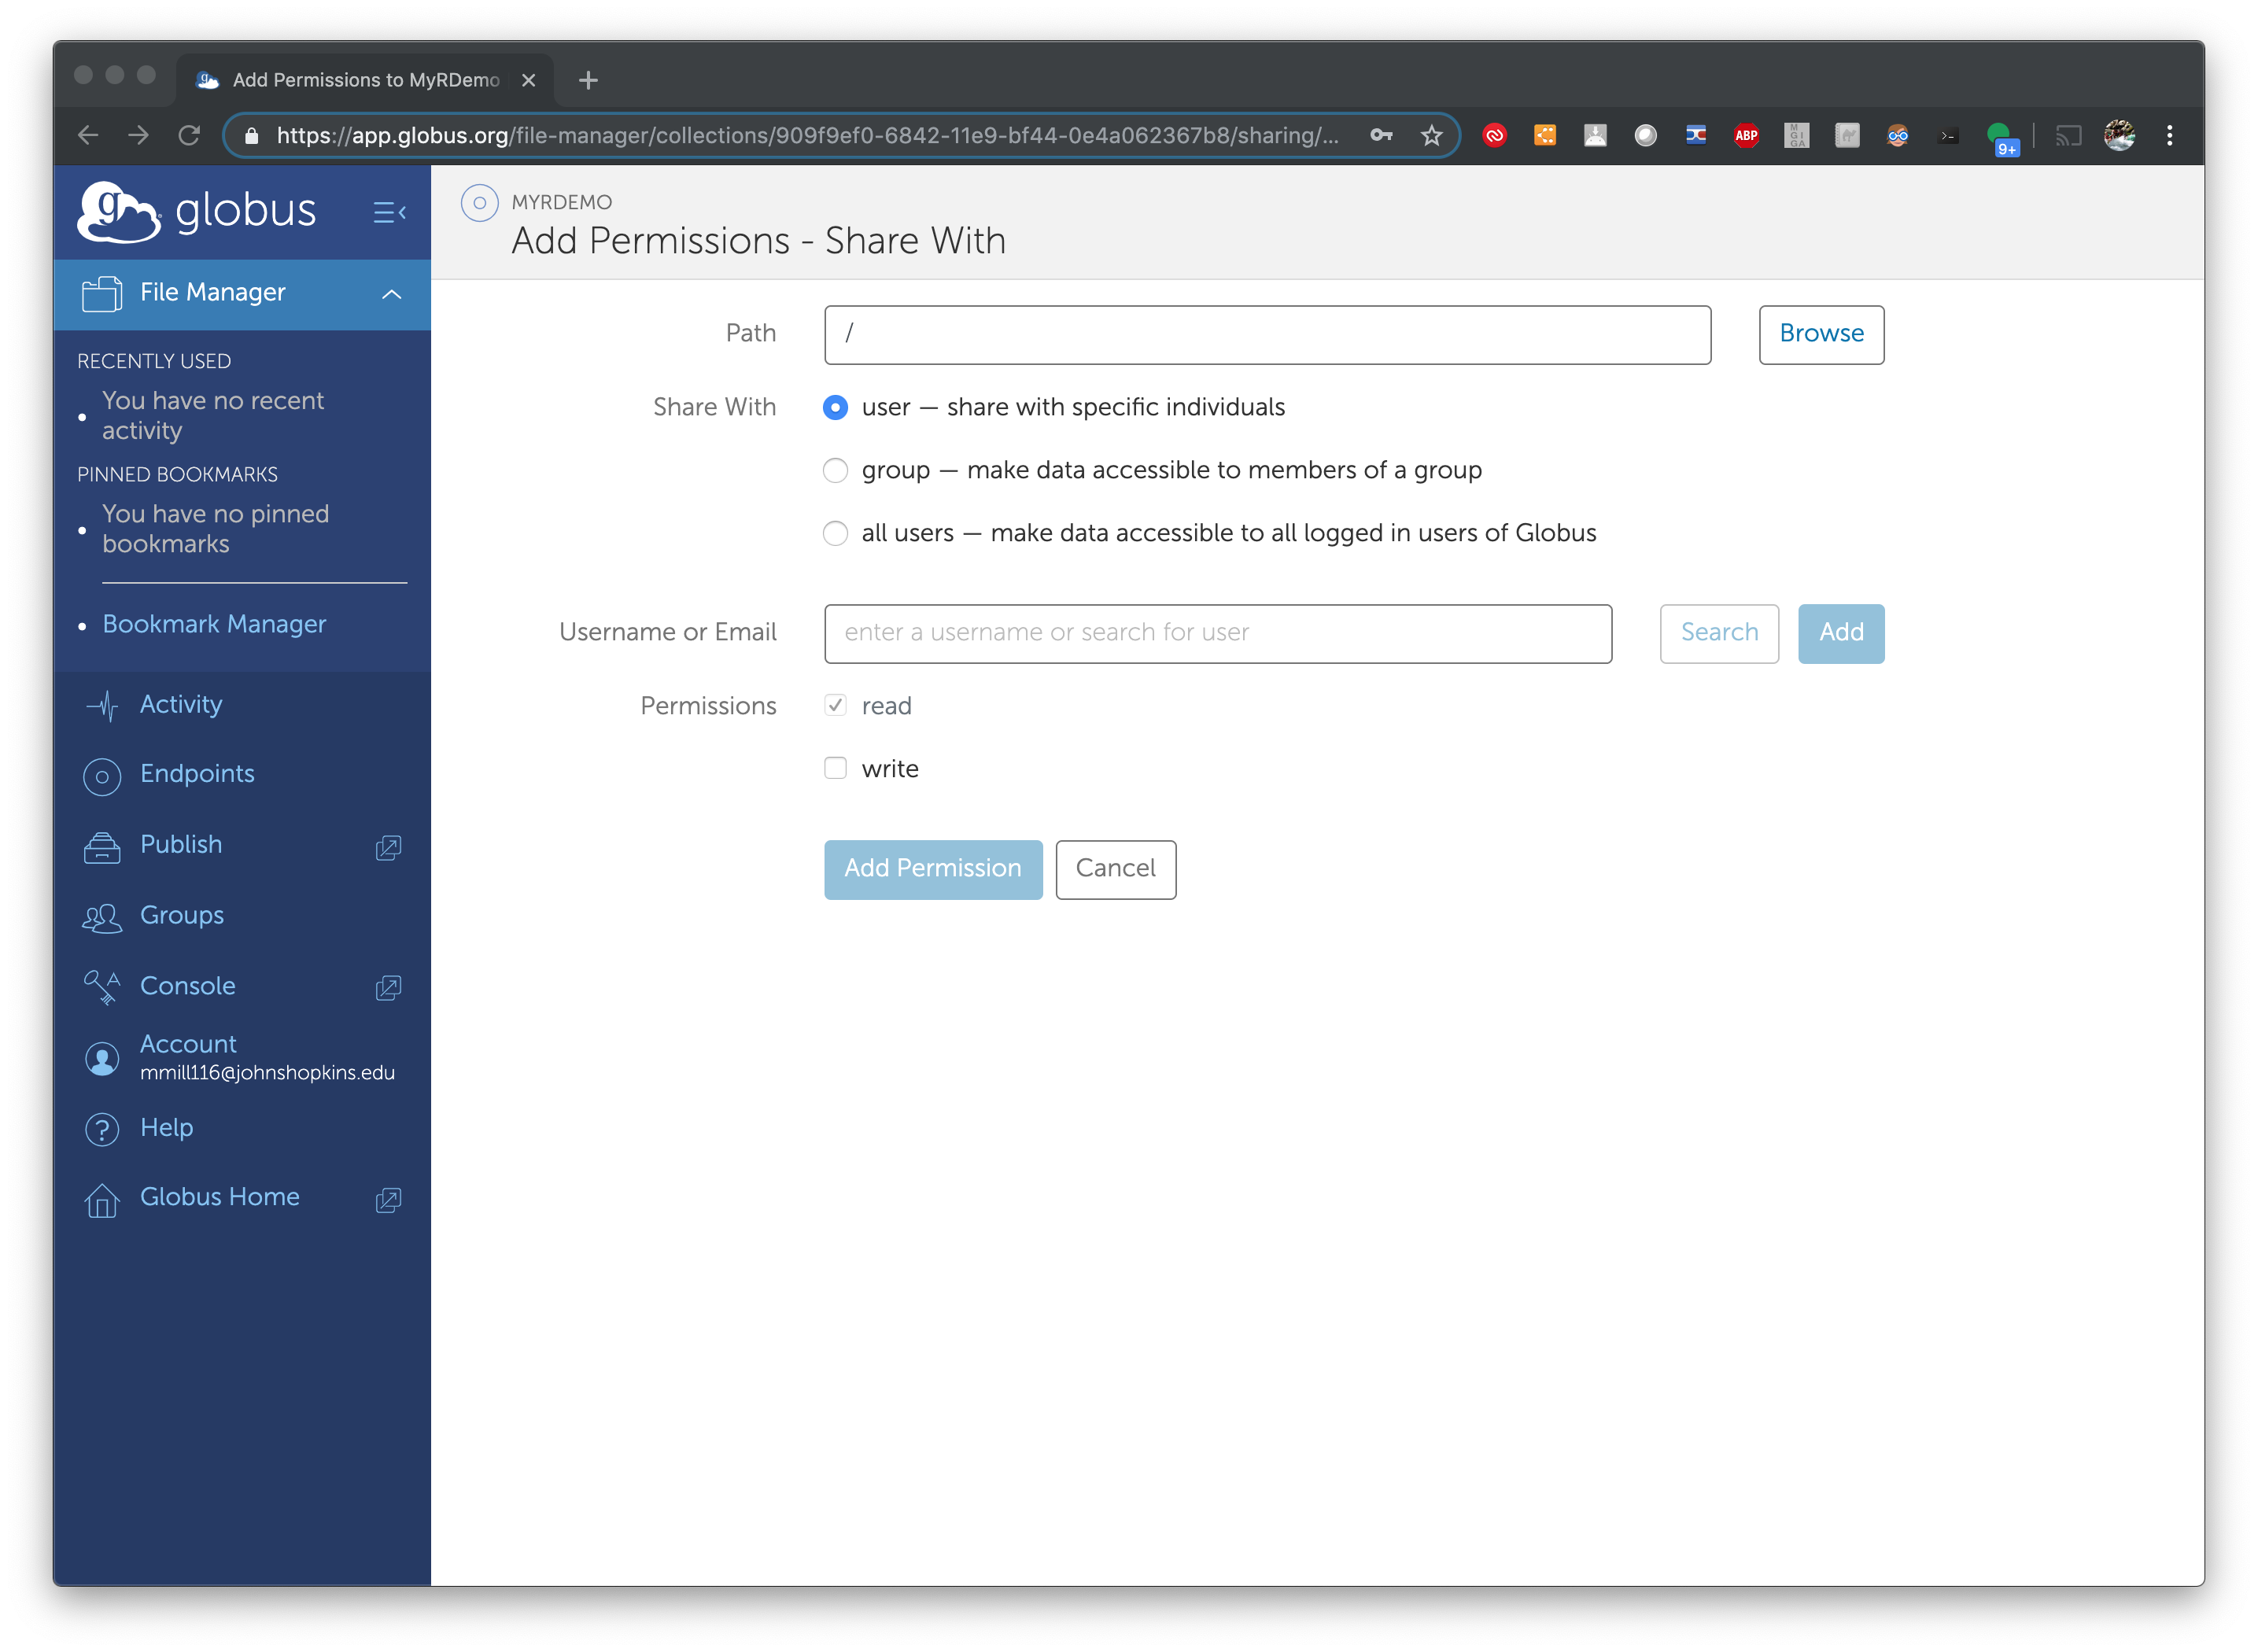
Alternatively. you can create an “anonymous share” to share a directory with anyone on Globus. To do this select “all users”. Again, we strongly recommend that you only grant “read” permission for your share.

Once your share is created, you can notify your collaborators that they can access your data by using the Share name you created (in this example it’s “MyRDemo”), and can search for your share name.
